
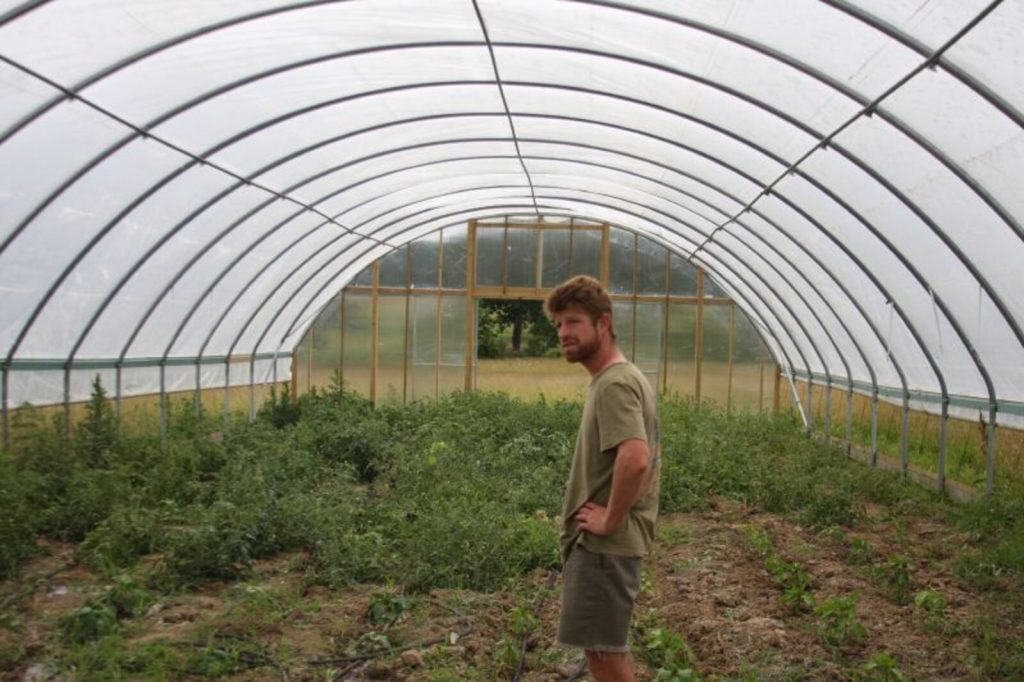
Building a greenhouse in Uganda means getting six things right in order: where it sits, which way it faces, what the frame is made of, how the cover is fixed, how air leaves the roof, and how the beds are laid out inside. Most suppliers sell an installed kit, so this greenhouse construction guide is written for the decisions you still own either way.
The frame is the part everyone argues about. It is rarely the part that fails first.
Houses in this region come down in wind, cook their crop because the vents are too small, or rot at ground level inside four seasons. All three are decided before a single pole goes up, and none of them is fixed by paying more for steel.
Siting a Greenhouse on Ugandan Farmland: Slope, Drainage and Water
Start with water, in both directions. The site needs water arriving on demand and rainwater leaving fast.
A greenhouse crop gets nothing from the sky, so a source you control within easy reach of the house is the first condition, not an afterthought. Distance costs you pipe, pump fuel and, more damaging, it costs you consistency in the one month you cannot afford to miss a watering. If the nearest reliable water is a walk away, deal with that before choosing a site, whether through storage on the plot or a delivery line. Capacities and stands are set out on farm water storage tanks.
Drainage is the mirror problem. The whole roof area sheds rain onto a strip either side of the structure, and a house built in a hollow ends up standing in the water it just concentrated. Choose ground with a gentle fall of a few per cent, never a flat pan and never the bottom of a slope where runoff collects. Cut a shallow trench along both long sides to take the roof discharge away, and lead it somewhere useful rather than into the path you walk on.
Two other site conditions matter. Full sun from mid morning to mid afternoon, so no mature trees on the eastern or western side, and no shading building close by. And cropping history: ground that has carried tomato, sweet pepper, Irish potato or eggplant for several seasons is likely to be carrying bacterial wilt and root knot nematode, and a polythene roof does nothing about either. Pick ground with a different history if you have it.
Greenhouse Orientation for Prevailing Wind and Sun
Orientation is free at the planning stage and expensive to change afterwards, and it is the item most Ugandan builds decide by accident.
Natural ventilation in a tunnel or vented house is driven by two forces. Warm air rising and leaving through the roof, and wind pushing air in one side and out the other. Above roughly 1.5 metres per second of outside wind the wind effect takes over almost entirely, and at that point the only question is whether your vents are pointed into it. Airflow through a side vent is measurably higher when wind arrives square on to the opening than when it runs along the wall.
So the working rule is that the long axis of the house sits across the prevailing wind, presenting the long netted sides to it. Stand on the site on a windy afternoon rather than guessing, and if you are near a large water body or on a slope, note that the direction reverses through the day. Where the dominant wind conflicts with the sun, wind usually wins in Uganda, because the sun is overhead for much of the day and shading from the frame itself is minor this close to the equator.
If you are putting up more than one house, leave a real gap between them rather than pairing them tight. Research installations commonly space tunnels several metres apart so the downwind house is not breathing the upwind house's exhaust. Two houses shoulder to shoulder ventilate worse than one.
Setting Out the Site and Preparing the Soil Before the Frame Goes Up
Clear and level the footprint, then set out the rectangle properly with pegs and string, checking the diagonals match rather than trusting the corners to be square. A frame erected on an out of square base never seats the cover cleanly and leaves gaps at the ends that let pests in for the life of the house.
Footings come next. Uprights sit in concrete, commonly mixed around one part cement to three parts sand to six parts aggregate, in holes a little over a handspan across. Depth matters more than diameter: a shallow footing lifts in wind and loosens over a few wet seasons. Suppliers usually ask the farmer to provide the sand, aggregate, water and unskilled labour for this stage, so read a quote carefully to see where the split falls.
Do the soil work before the structure encloses the site, because access afterwards is miserable. Take soil samples across the footprint and have them tested, so the fertiliser programme is built on the actual analysis rather than a general recommendation; soil testing before fertilizer application explains how. Regional practice is to trench the bed lines to around two feet, mix well rotted manure and wood ash back in with the soil, and form the beds over that trench, which feeds a crop that will stand in the same ground for eight months or more. Doing this with a tractor or a hired team is straightforward on open ground and close to impossible inside a finished house.
Greenhouse Frame Materials: Treated Timber Against Galvanised Steel
This is the real fork in the road, and the honest comparison is not the one in most brochures.
Whichever you choose, frame geometry follows from the ventilation requirement rather than from cost. Fabricators here work to gutter heights of roughly 2.2 to 3.0 m on timber houses and 2.2 to 4.0 m on steel, with an apex around 4.5 to 6.0 m. Head room above the crop is where hot air collects before it leaves through the roof vent. A short house has nowhere to put that heat, so building low to save money buys you a structure that overheats for its whole life.
What Termites and Rot Do to a Timber Greenhouse Frame
Suppliers commonly quote timber houses at three to six years and steel at nine to fifteen. Treat those as sales figures. Ugandan field evidence on treated eucalyptus is available and more useful, because electricity distribution poles are the same species, the same treatment processes and the same soils.
A Ugandan study of treated wooden distribution poles in service found the average service life was about ten years. Of the poles that failed, fungal decay and termite damage accounted for 85.3 per cent of failures in poles treated with copper chrome arsenate and 67 per cent of those treated with creosote. Those poles were pressure impregnated in a commercial plant. Regional comparisons put untreated timber in ground contact at roughly two years against about fifteen for properly treated material.
Read that carefully, because it says three things at once. Properly treated eucalyptus can give a decade in Ugandan ground. Termites and rot still cause most of what failures there are. And untreated timber in the same ground is finished in about two years.
The practical conclusion is that the treatment, not the species, decides whether a timber greenhouse is cheap or merely inexpensive to start. Brush applied preservative on a green pole is not the same product as pressure treatment, and the difference shows up at the soil line where you cannot see it. If you build in timber, buy poles that were properly treated and seasoned, ask what process was used, keep the treated surface intact rather than trimming the buried end after treatment, and follow whatever handling and safety instructions the treatment carries on its label. Where a preservative touches soil that will grow food, check with the treatment yard or a local extension officer what is registered for that use before you commit.
One cheap improvement is worth more than most: set timber uprights in concrete with the collar standing slightly proud of the ground so water runs off rather than pooling at the pole, and keep soil and mulch pulled back from the base. Rot and termites both want the damp zone right at the surface.
Covering the Greenhouse in UV Treated Polythene and Fixing It Down
The cover is the cheapest major component and the one you will buy again. Get the specification right and the fixing right, because a film that is correct but badly held on tears out in the first storm.
| Covering | Where it goes | Notes |
|---|---|---|
| 200 micron UV film | Roof and gables | Regional standard |
| 150 to 180 micron | Roof, budget builds | Shorter life |
| Anti drip film | Roof | Stops leaf wetting |
| Insect net, 40 mesh | Side vents, ends | Cuts airflow |
| Shade net | Over roof, hot sites | Added later |
| Black base wrap | Skirt at ground | Blocks pest entry |
Two specification points carry most of the value at this stage. Insist on UV treated film rather than plain polythene, and get the warranty period stated in writing, because that period is the nearest thing to a service life figure a supplier will commit to; how often you will actually be buying film, and what that does to a budget, belongs to our greenhouse cost page. Second, specify an anti drip or anti condensation grade for the roof. Plain film gathers condensation on its underside, and those drops land on foliage, which is free water on the leaves and undoes the one thing the house was built to do.
Fixing is a system, not a set of nails. The film is tucked into an aluminium or steel channel, usually a D section profile screwed to the frame, and held there by a wiggle wire, a zigzag spring with a plastic coating so it does not cut the film. That arrangement grips along the whole length instead of at points, releases for replacement without destroying the sheet, and is the reason a properly covered house survives wind that strips a nailed one. Timber builds often use battens instead; if so, put a strip of old film or rubber under the batten so the timber edge does not saw through the cover.
Leave the film slightly slack on a cool morning rather than drum tight. Polythene expands in the heat of the day and a sheet stretched tight at dawn is a sheet under load by noon.
Insect Netting on Side Vents and Roof Vents to Keep Pests Out
The sides of a tropical greenhouse are netting, not film. That netting is doing two jobs that pull against each other, and this is where most builds quietly go wrong.
A fine mesh, around 40 mesh, excludes whitefly, aphid, thrips and leaf miner, which is the point. It also blocks air. Measured work shows insect screens reduce the effective vent area, add resistance to airflow, and so raise both temperature and humidity inside, which can increase disease incidence rather than reduce it. Vent area itself is measurable in its effect: a house with about 18 per cent of its surface as vent held the internal humidity rise to around 11 per cent, against roughly 18 per cent for a house with only 7 per cent vent area.
Then the crop arrives and makes it worse. A standing crop has been measured cutting the ventilation rate of a side vented house by up to 28 per cent, and a tomato crop grown to about 2.1 metres cut it by 72 to 85 per cent against an empty house. Your house ventilates well in week three and barely at all in month four.
Design for month four. That means generous vent openings, netting sized so the total open area is large even after the mesh takes its cut, and a roof vent rather than side vents alone, because hot air stratifies at the top and only a roof opening lets it go. Roll up sides on a continuous run ventilate better than a few fixed panels. Detail on sizing and operating vents sits on greenhouse ventilation, and if your site is genuinely hot, shade nets in agriculture covers the shading option.
Door and Entry Design for Greenhouse Biosecurity
Almost every pest that establishes inside a netted house walked in through the door on somebody. Fabricators in the region fit what they call a sanitary pouch and rarely explain what it is for.
The principle is simple: never have a single doorway that opens the inside straight to the outside. Build a small porch or vestibule with two doors, so one is always closed. Both doors need to self close, because a door propped open during harvesting undoes the entire netting investment in an afternoon. Hang them to open inward, fit a proper frame so there is no gap at the threshold or hinge side, and net the porch as well.
Inside the porch, put a shallow tray of disinfectant for boots and a hook for a dedicated set of overalls that stay in the house. Both are cheap and both matter, because bacterial wilt travels on soil carried in on footwear from a field crop. Keep tools for the house in the house.
Position the door in a gable end rather than a long side, so opening it does not interrupt the cross ventilation you carefully arranged. And keep the doorway wide enough for a wheelbarrow, since everything going in and out of a greenhouse over eight months goes through this one opening.
Anchoring and Bracing the Greenhouse Against Wind
A greenhouse is a large light box with a flexible skin. Wind does not push it over so much as lift it, and when a house fails in a storm it usually fails at the foundation or at the cover fixing rather than in the middle of a pole.
Three things hold it down. Footings deep enough and set in concrete rather than rammed earth, because an upright that can move even slightly will work itself loose over successive wet seasons. Diagonal bracing in the corner bays and across the end frames, which is what stops the whole rectangle racking into a parallelogram, and which is the item most often left out of a cheap build. And a continuous cover fixing along the profile, since a sheet gripped only at intervals peels from the first loose corner.
Regional builds add flat strapping, often described as hooping iron, run over the film between the arches on exposed sites. It costs very little and it converts an area of film that can balloon in a gust into several smaller panels that cannot. On a windy ridge it is worth asking for whether or not the standard package includes it.
Check the anchoring and the fixings after every serious storm rather than once a year. Small failures are cheap to correct and they are what large failures start as.
Internal Layout: Beds, Paths, Spacing and Crop Support
Internal layout is where a build either supports an eight month crop or fights it, and it is fixed by the bed lines you form before planting.
Beds run along the long axis of the house, in line with the airflow, so air moves down the rows instead of across them. The layout used in greenhouse tomato research pairs rows into a double bed: two rows about 0.5 m apart, plants about 0.5 m apart along each row, and a working path of about 1.2 m between one double bed and the next. That works out at a little over two plants for every square metre of floor, which is a good deal less than the plant counts on supplier price lists, for a reason that is worth reading about in the greenhouse size guide.
Paths are not wasted space. You will walk them several times a week for months carrying crates, and a path narrowed to gain two more plants brushes the crop every time somebody passes, which spreads disease on clothing. Leave a wider cross path at one end for turning a wheelbarrow and setting down harvest crates.
Crop support goes in at build time, not later. Run galvanised wire along the length of each row, fixed to the frame at roughly two metres above floor level, and train each plant up a length of twine to that wire as a single stem with side shoots pruned off. Putting that wire up means it is carrying the weight of a mature crop for months, so tie it to the structural frame rather than to purlins that were never meant to take the load.
Lay the irrigation lines before the beds are planted and while you can still reach everything. Drip is the method inside a greenhouse; overhead sprinklers put water back on the foliage and undo the rain exclusion you paid for. The layout and components are covered on greenhouse irrigation systems.
Build Mistakes That Cost a Greenhouse Its First Harvest
Frequently Asked Questions About Greenhouse Construction
Can I build a greenhouse myself instead of buying a kit? The timber version, yes, if you can set out a square rectangle, mix concrete and work at height safely. What people underestimate is the cover fixing and the vent sizing, which are the two items that decide whether the house performs. If you self build, buy the profile and wiggle wire system rather than nailing the film through battens, and design the vents larger than looks necessary. Steel tunnel frames arrive as a cut and drilled kit, so there is little to gain by fabricating your own.
What does it cost to build a greenhouse in Uganda? Suppliers quote the whole structure rather than the parts. Timber framed houses are published in the region of UGX 4,000,000 to 9,000,000 and metal framed houses from roughly UGX 4,500,000 for the smallest units to about UGX 15,000,000 for standard commercial sizes, with larger houses above that, and the figure moves with size, frame material, your location and how much labour you supply. Site works, the water connection, irrigation inside the house and the crop inputs usually sit outside the quote. The breakdown by size and covering type is on our greenhouse cost page.
How long should the structure last? The frame and the cover have completely different lives, which is the useful way to think about it. A galvanised steel frame is a long term asset; well treated timber in Ugandan ground has given about a decade in comparable service, with decay and termites causing most failures. The polythene cover is a consumable you replace every few years regardless of what the frame is made of. Budget for the cover from the start and the house stops feeling like a repeated shock.
Which way should the greenhouse face? Put the long axis across the prevailing wind so the long netted sides catch it, and site the door in a gable end. Wind driven cross ventilation is your only real cooling, and it works substantially better when the wind meets the vent square on rather than sliding along the wall. Check the wind on the actual site over a few afternoons instead of assuming.
Do I need a concrete floor? No, and it is usually a mistake. Crops grow in the soil beds, so a slab only makes sense in the paths, and even there a firm compacted earth path drains better and costs nothing. What you do want is footings in concrete and a clean base skirt of dark polythene at ground level, which blocks crawling pests and keeps soil off the film.
Can I convert a greenhouse to a net house later? Yes, and on a hot site it can be the right move for leafy crops or seedling raising. The frame carries either covering. What you cannot do is keep growing wet season tomato in it, because rain exclusion disappears with the film. Nursery structures are a different build again, covered in nursery shade house construction.
How much land does one house need beyond its own footprint? More than the dimensions suggest. Allow room to walk right round the outside, space for roof runoff trenches on both long sides, a level area for crates and inputs at one end, and vehicle access. If you plan a second house, leave several metres between them so the downwind one is not ventilating into the upwind one's warm air.
One thing left to do before anyone starts digging. Walk the pegged out footprint with whoever is erecting it and settle out loud who cuts the footings, who brings the sand and aggregate, where the runoff trenches will run and which gable the door goes in. Every one of those is cheap to change while there are only pegs in the ground and expensive once a frame is standing on them. The rest of the irrigation and greenhouse guides cover sizing, cost and the crop that goes inside, and any supplier will confirm what an installed structure built to your written specification currently comes to.