
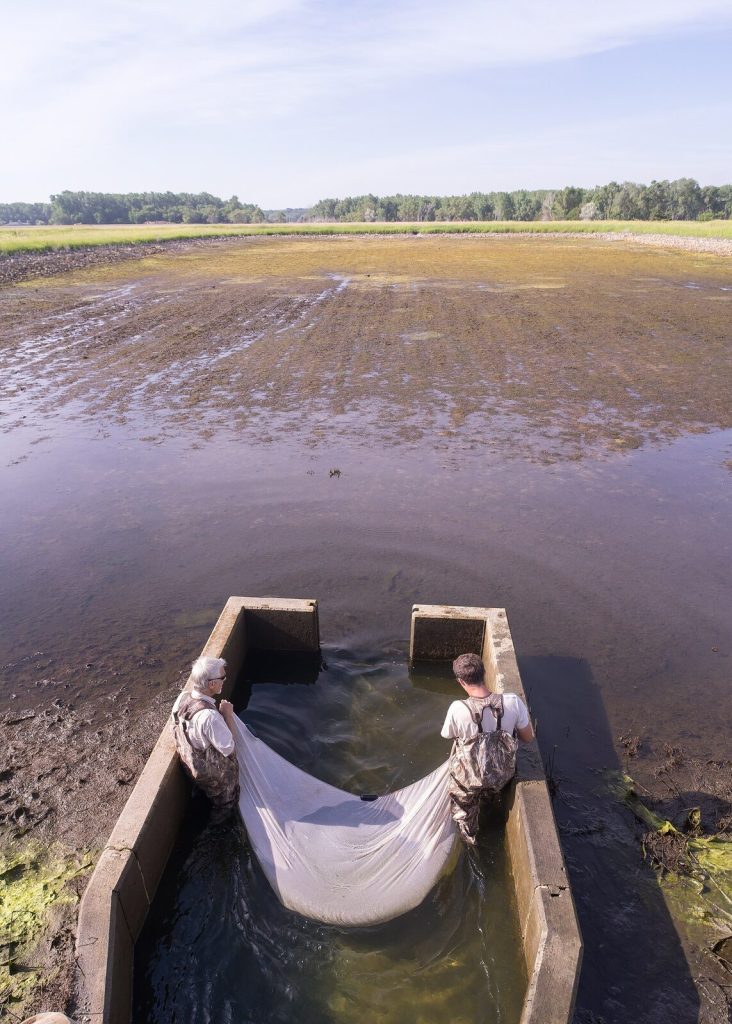
Fish pond construction begins with a soil test, not a digger. A pond holds water only if the site carries clay or clay loam with at least 30 percent clay, sits on a slope near 2 percent so it fills and drains by gravity, and lies above the water table outside any wetland. Everything after that is layered compaction, a screened outlet, and a floor that slopes to the drain.
The order matters more than it sounds. A feasibility study commissioned by Uganda's agriculture ministry for a public aquaculture park in Apac district opens its soil section by recording that the land had already been designated for pond based production before anyone surveyed whether it would hold water. The sampling eventually done took soil only from 15 cm below the surface, which the study says gives no more than a preliminary idea. Part of the site turned out rocky, stony and silty, and would need liners. If that happens on a government project with consultants on it, it happens on a smallholding with a hired excavator.
Testing Whether Your Soil Will Hold a Fish Pond
Ugandan extension guidance names two field tests that cost nothing and settle most of the question. Both are worth doing at several points across the proposed pond area, because soil changes over a few metres and one bad patch drains a whole pond.
What passes: clay, and clay loam with a clay content above 30 percent. A Ugandan engineering assessment puts the best material slightly finer, at sandy clay to clayey loam, on the grounds that the same soil also grows natural food on the pond bottom. What fails: sand, silt, humus, gravel and anything rocky. Black cotton soils are the awkward case, common through eastern and northern Uganda in cotton, groundnut and tobacco country. They mould well and then crack wide open as they dry, and the ministry's answer is to work plenty of organic matter in to seal the cracks.
Two further disqualifiers come from the engineering side rather than the extension side. An organic layer more than 0.60 m thick makes a site unsuitable for any kind of fish pond, because seepage will beat you and dyke soil would have to be carted in from elsewhere. Large surface stones or rock outcrops leave you with lined ponds or concrete tanks, which is a different budget. For a proper look rather than a field feel, dig a test pit about 0.8 m by 1.5 m to a depth of 1.5 m to 2.0 m in each hectare of the site, deep enough to see the layers and the water table. Fifteen centimetres of topsoil tells you almost nothing.
Reading the Slope: Which Pond Type Your Farm Land Allows
Take levels every metre across the site to work out the gradient. The gradient then decides the pond, and the decision is not really yours to make.
The ideal is a gentle slope of about 2 percent, impervious soil, ground above the water table and outside any wetland, no rock outcrops or large trees and roots, road access, and land ownership that is not in question. Flat ground is a site to avoid because it floods and has to be pumped dry; steep ground is one to avoid because both construction and upkeep cost more and daily work becomes awkward. Note what the slope also does to shape: the maximum length of a pond is limited by the gradient, so the gentler the fall, the longer a pond can run. That is one of the constraints behind the pond size decision.
Planning the Farm Layout Before Any Pond Is Dug
One instruction in the ministry's layout guidance is worth pulling out of the middle of a table, because ignoring it can cost you a wet season. Build the drainage canal first, before the ponds. If it rains during construction, water then has somewhere to go and the site does not flood.
The rest of the layout is a set of levels that have to step down in order. The inlet canal or pipe carries water from the source or farm reservoir and should be large enough to fill every pond on the farm in under 50 days, with each pond's own inlet set at least 10 cm above its normal water level. The drainage canal sits at least 30 cm below the terrain level, usually at the farm perimeter, with at least 2.0 m between the outer dyke toe and the main drain. Internal drainage channels run at least 20 cm deeper than the lowest point at which a pond drains. Any effluent treatment pond sits at least 60 cm lower again than the lowest point of the drainage channel, so settling happens under gravity before water returns to the stream.
Access routes go on top of the dykes, and every pond should be reachable independently so inputs can go in and harvested fish can come out without crossing another pond's wall. Put a waste disposal pit somewhere well away from the water for farm rubbish and dead fish, since carcasses left near ponds draw birds. One figure in this part of the manual is not usable: an inlet flow of "0.9 m3/m" said to be adequate for 4,000 square metres of pond surface, where the unit as printed is neither a rate nor a volume. Size the inlet against the fill time instead, which the same guidance gives as within 10 days for a single pond.
Marking Out the Pond So It Drains to Harvest
Clear the site of bush, stumps and debris first, then strip the topsoil and stack it aside. That topsoil goes back on the dyke at the end to hold grass, so losing it means buying it back in labour. While clearing, check whether the soil type varies across the pond area, because one end may need better material carted from the other.
Peg the perimeter. Then run a centre line marking where the inlet and the outlet will sit, and take levels at each peg on that line, since those readings are what tell you how the floor has to slope. Peg the inner toe too, not just the outer line, and if you want a harvest basin, peg it now. Take extra levels from the inner toes across to the drainage so you know the floor falls toward the outlet and what the lowest point there has to be. The floor slope from each corner toward the drain should be no more than 2 percent.
The outer line becomes the centre of the dyke, not its edge. Getting that wrong is how a wall ends up half the width it was meant to be.
Building the Dyke: Soil, Layers and Compaction
A core trench is optional and cheap insurance. It is an impermeable layer built into the middle of the wall to stop water seeping through and to stop the wall sliding. Dig a trench along the perimeter pegs, and even a shallow one earns its keep because it cuts the root zone. Fill and compact it with good clay, and do not let it dry and crack before it is covered. An HDPE plastic sheet does the same job where clay is short.
Then build the wall upward from the base, layer by layer, over the core trench where there is one. Spread 20 cm of soil, moisten it if it is too dry, and compact that layer down to about half its thickness before the next one goes on. Compacting the whole wall at the end does not work; the machine only reaches the top.
Slope the faces gently, and make them gentler as the pond gets bigger. A gentle face breaks up waves before they hit the wall, which cuts the chance of collapse, cuts siltation and cuts leaks, so the pond lasts longer and costs less to maintain. It also means a person can walk into and out of the pond while seining instead of jumping in and climbing out, which matters every harvest day and matters more when someone is carrying a net full of fish.
Pond Depth That Grows Fish and Keeps Birds Out
A pond should hold an average depth of one metre through the whole production cycle. The reason goes beyond fish needing volume. Ugandan guidance gives that depth as the control for wading birds: herons, marabou storks and hamerkops walk into a pond to fish, and a pond held at an average of one metre gives them nowhere to stand. Predators were the leading constraint named by 200 surveyed fish farms in central Uganda, so depth is doing more work here than any other single dimension.
The manual states depth twice and the two statements sit either side of each other rather than agreeing exactly. In its pond standards it gives optimum maximum depths of 80 cm at the inlet end and 120 cm at the outlet. In its harvest basin section it gives minimum water depths of 0.6 m at the shallow end and 1.0 m at the deep end. Read together, the usable specification is a shallow end between 0.6 m and 0.8 m and a deep end between 1.0 m and 1.2 m, with the qualification that the lower pair alone averages under a metre, so a pond built to the minimums will not hold the average depth the same guidance requires. Build toward the upper pair.
Depth also constrains the bottom slope. About 2 percent is recommended, and a steeper floor makes the average depth impossible to hold while pushing the outlet end deep enough to be unsafe to seine.
Installing the Outlet Pipe for Draining and Harvest
Install the outlet before the inlet. Ideally the two sit opposite each other so the pond flushes across its length, though the guidance says this matters less if you flush properly. Pipe beats concrete for both: concrete outlets tend to leak, and a pipe can be screened completely against predators and gives better control of flow.
Cut into the wall where the outlet will go and excavate the pipe trench to the slope you want. The assembly then has four parts beyond the pipe itself, and two of them are collars that do very different jobs.
The anchor collar is concrete moulded around the pipe. It holds the pipe and bend down while the pond is full and the pipe is empty, because a pipe full of air wants to float, and an upward thrust at the bend either dislodges the joint or moves it enough to start a leak. The anti seep collar goes on after it, built up from strips of old tyre tubing tied tightly around the pipe to a height of about one to two inches and a width of about 10 to 15 cm. Its job is to interrupt the path water takes along the outside of the pipe, because plastic and clay do not bond to each other. Fit a flexible joint at the bend so the standpipe can be tipped down to drain and lifted back up, backfill the trench and compact it in the same layers as the rest of the wall, then screen the outlet whenever the pond is in use so fish do not leave during heavy rain.
Pipe diameter follows pond area, and the guidance is consistent across two places in the manual.
| Pond area | Outlet pipe | Inlet pipe |
|---|---|---|
| Under 1,000 m2 | 4 inch PVC | 2 inch |
| 1,000 to 2,000 m2 | 6 inch PVC | 2 or 4 inch |
| Over 2,000 m2 | 6 inch PVC | 4 inch |
| Limited water supply | By pond area | 2 inch |
One statement in the outlet section cannot be followed as printed. It reads that the outlet should be placed 60 cm above the intended water level to stop fish swimming out. An outlet above the water line cannot drain a pond, and every other passage in the same manual puts the outlet at the pond's lowest point and the height requirement on the inlet. Treat that sentence as a misplaced inlet specification, put the outlet low, and take the height requirement from the inlet section below.
Fitting the Inlet Pipe on a Fish Farm
Cut and excavate the inlet trench at the shallow end. Two rules govern the pipe, and both exist because of things fish do.
First, the inlet pipe should be smaller in diameter than the outlet. That way, if somebody leaves the inlet running, the outlet can still carry the water away and the pond does not overflow. Use 2 inch pipe for ponds under 1,000 square metres or wherever the water supply is limited, and 4 inch where water is plentiful.
Second, set the inlet at least 20 cm above the intended water surface. Fish swim against a current, so an inlet at or near the water line is an invitation: they push up the incoming flow and leave. Raised and properly screened, it stops them going out and stops wild fish coming in, and a filter sock on the pipe keeps out what the screen misses. The internal channels feeding individual ponds carry the same 20 cm minimum.
Avoid open earthen channels as inlets to a commercial pond. They are difficult to screen and they erode, which means each year they sit a little closer to the pond's water level until the difference that was keeping your fish in has gone.
Levelling the Pond Floor for Seining and Harvesting
The floor has to end up smooth, firm and falling toward the outlet. Fill the pot holes and level the bumps, then compact. Each of those has a reason a farmer can check.
Pot holes hold water after the pond is drained, which shelters fish from the last cycle, and those survivors then eat the fingerlings you stock next. They are also where somebody walking a seine net trips and hurts themselves in water they cannot see through. A soft bottom is worse again: it goes muddy during production, which suppresses pond productivity, gives fish somewhere to hide from the net, and traps them in the mud when you drain.
Pour water across the floor as you work so you can see where it actually runs. If it pools, the level is wrong. Compact the floor once more after levelling.
Free Board, Dyke Tops and Planting Grass
Free board is the height between the water surface and the top of the wall, and the recommended figure is 20 to 30 cm. It is one of the few dimensions where both too little and too much carry named penalties.
Under 20 cm is dangerous in a flood, and African catfish escape once the free board gets wet, which is a whole crop walking out over the wall. Above the recommended range you pay for earth you did not need, and you get burrowing animals, birds nesting in the exposed bank and anthills opening leak paths, a wall that is harder and more dangerous to work on, and a face that can collapse into the pond. The stated benefits of keeping it inside the range are practical rather than theoretical: air moves freely over the water, which helps mixing and oxygenation; feeding, seining and water checks are easier; and there is less bank area for rain to erode into the pond.
Dyke top width has a minimum of one metre between ponds, and the main dyke at the deep end should be wider than the divider dykes because that is where fish and feed move. Where vehicles are involved the figures go up: a Ugandan engineering design for hectare sized ponds specifies at least 2 m of crest between neighbouring ponds and at least 3 m on the perimeter dykes so small trucks and tractors can reach every pond.
Finish by compacting the bank again, spreading the stacked topsoil over it and down to the water line, compacting lightly, then planting grass over that topsoil and watering it until it takes. Grass is what stops the wall washing into the pond every time it rains.
Harvest Basins: When They Earn Their Cost
A harvest basin is optional, and the decision is about labour. It is a deeper section, inside the pond or just outside it, that the whole pond drains into, so fish end up held in a small volume of good water rather than chased around a drying pond floor.
Where it pays: in hatchery and nursery ponds that get drained often, in ponds that are difficult to drain, and anywhere the labour of a complete harvest is the bottleneck. It also lets you hold and handle fish alive without stressing them, which matters when the buyer wants them alive. If the basin sits inside the pond, excavate it before you build the outlet, because it has to drain completely into that outlet and the levels are unforgiving.
Size follows three things: the scoop net you will use, the standing crop you expect to hold, and whether you can get fresh water into the basin to exchange. Cost, access to the fish, elevations and pipe placement decide whether it goes inside or outside. Harvesting method itself is covered in the harvesting guide, and live handling in transporting live fish.
Tools and Labour for Pond Construction on a Ugandan Farm
The tool list divides into three jobs. Measurement and marking out needs a tape measure, string and cut sticks for pegs, plus a line level or surveying equipment for taking levels, which happens continuously rather than once. Earth moving and compaction needs either machinery or a great many people, along with a manual hand compactor, motorised compactors or sheep foot packer rollers depending on scale, and old gunny bags for moving and holding soil. The third job is the one people forget: keeping the soil at the right moisture while it is being compacted, which needs containers, jerry cans, hoses or sprinklers to bring water to the wall as it goes up.
Dry soil does not compact. If the water is not there, the wall goes up looking finished and leaks from its first filling.
Maintaining and Rebuilding a Pond Between Harvests
Ponds silt up, walls erode and leaks open, all from ordinary use: wave action, fish working the bottom, and seine nets dragging the floor. Three jobs come round repeatedly.
De-silting first. Scrape the silt off the bottom and heap it until it is semi dry, then use that same soil to rebuild the eroded parts of the dyke, which turns a waste problem into material you would otherwise buy. Do not leave the heaps on the pond bank, because the next rain washes them straight back in. Cart away what you do not need well clear of the pond area.
Second, rebuilding the wall. The inside face gets steeper as it erodes, and once it is steeper than the recommended slope, trim it back and rebuild it upward in compacted layers exactly as it was first built. Third, chasing leaks, which is mostly a matter of watching where the water level falls faster than evaporation explains.
Old ponds show all three at once: broken walls, accumulated silt and a pond that has become too shallow to keep birds out. A pond that has gone shallow has quietly lost its predator control, which brings this back to depth.
Where Pond Construction Goes Wrong in Uganda
Three defects in the published standards are worth knowing about, because a reader working from the manual will hit them and may not notice.
Beyond the paperwork, the recurring physical failures are all decided before the pond is finished. A pond dug into a wetland or into ground with a thick organic layer fills easily and then cannot be drained or dried, which forfeits complete harvesting and pest control between cycles. A pond on untested soil seeps, and no amount of good management afterwards recovers it. A pond built flat needs a pump on the water bill for the rest of its life. And a pond whose wall went up without water on hand compacts to nothing, which is the same failure as untested soil arriving by a different route.
Once the structure holds water, the next decisions are how much water it holds and what goes into it. Volume and area are worked out in the pond size guide, the number of fish that volume carries in stocking density, and the lime, fertiliser and oxygen regime in pond water management. Where a pond sits in the whole enterprise is covered on the fish farming in Uganda pillar, reached from the fish farming hub, and the alternatives to digging at all are in tank systems and cage systems.
Fish Pond Construction Costs and Questions Ugandan Farmers Ask
How much does it cost to construct a fish pond in Uganda? Ugandan reporting puts excavation and compaction at around 1,000,000 shillings or less for roughly 400 square metres, with about 1,600,000 quoted for a complete pond and larger ponds running to about 8,500,000. Fittings are separate: a gate valve has been quoted up to 60,000 shillings a pond and a predator net up to 300,000. Plumbing from the water source to the pond cannot be quoted at all in general terms, because it is entirely a function of distance. The full cost inventory sits on the cost of fish farming page.
Can I dig a pond by hand instead of hiring machinery? Yes, and most small Ugandan ponds were. The part hand work usually loses on is compaction, not excavation. A dyke built up in 20 cm layers, each one moistened and compacted to about half its thickness, is achievable with hand compactors and enough water on site, but it is slow and it is the step people shorten when they are tired. A poorly compacted wall leaks from the first filling.
How deep should a fish pond be? Average one metre through the cycle, with the shallow end around 0.6 m to 0.8 m and the deep end around 1.0 m to 1.2 m, falling toward the outlet at about 2 percent. Shallower than that and wading birds can stand in your pond.
Do I need to line a fish pond? Only where the soil will not hold water and there is no alternative site. Porous soils such as sand and gravel have to be lined with an impervious material, and a site with rock outcrops or a thick organic layer leaves lining or concrete as the only options. Lining is a cost the soil test exists to help you avoid.
How long does a new pond take to fill and be ready for fish? A well built pond should fill and drain within about a week, and the reason is biological rather than impatience: water plants and predators establish in a pond that sits part filled, before there are any fish to defend. Size the inlet so a single pond fills within 10 days at worst.
Should the pond be rectangular? Yes, and there is a labour reason on top of the management one. Rectangular ponds are easier to seine, feed and manage, and the pond's width sets the length of seine net you need. Build every pond on the farm to the same width and one net serves them all.
Can I build a pond on flat land? You can, as an embankment pond sitting above the surrounding level, but water then has to be pumped in and pumped out for the life of the pond. Flat sites are also more prone to flooding. Where there is any choice, take the gentle slope.
Before you commit to a design, get quotations for the outlet and inlet pipe, screening and netting in your own district, and confirm what an excavator or a work gang is charging locally, since both move with fuel and season. Current prices and supplier options for fingerlings, feed and pond equipment are worth checking at the same time through the supplier directory and the fingerling price page, because a finished pond with no seed in it earns nothing.